미루고 미루던 깃허브, 드디어 한번 공부해보려고 합니다!
우선 개발환경 구축 과정.
1. Git 다운로드 및 설치 (윈도우)
Git - Downloads
Downloads macOS Windows Linux/Unix Older releases are available and the Git source repository is on GitHub. GUI Clients Git comes with built-in GUI tools (git-gui, gitk), but there are several third-party tools for users looking for a platform-specific exp
git-scm.com

2. New repository에서 생성


- Repository name을 설정해주고
- 공개여부 Public/Private 설정
- README는 개인 호불호로 잡고,
- Add .gitignore : 데이터베이스/환경설정 처럼 공개하고 싶지 않은 파일들을 담을 곳
- license : 라이센스 설정
3. 명령 프롬프트

git : help
git --version : version
git config --global user.name 유저명 : 컴퓨터 전체에서 동일한 환경 사용함 / 유저명 설정
git config --global user.email 메일주소 : 이메일 설정
cd directory : change directory
git clone 주소 : 주소의 repository를 복사
git
git --version
git config --global user.name wooni-github
git config --global user.email dwkim.research@gmail.com

cd ../../GithubProjects
git clone https://github.com/wooni-github/practice_private

여기까지 수행하면 윈도우 내의 폴더에 repository가 복사됨 -> local repository
깃허브 웹페이지 -> remote(원격지) repository
4. 변경 파일 연결

예제) 윈도우상에서 .txt파일을 만들어줌
cd practive_private

git add document.txt
git commit -m "Add Text File [document.txt]"
git add 파일 : 파일 repository에 추가
git commit -m "코멘트" : 코멘트 추가. 나중에 이 시점을 기준으로 복원한다던가 할 수 있겠죠.
=> 여기까지 하면 local repository만 반영되고, remote repositry는 아직 반영되지 않음.
git push
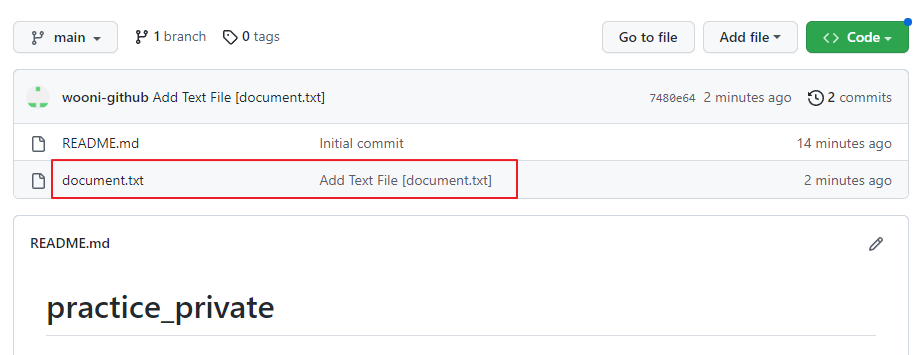
git push : remote repository 업데이트
'프로그래밍 기초 스터디 > 깃허브 - Github' 카테고리의 다른 글
| [깃허브 Github 공부하기] 6. 원격 저장소 (Remote repository) 관리하기 (0) | 2022.12.07 |
|---|---|
| [깃허브 Github 공부하기] 5. 브랜치(Branch) 만들고 통합하기 & 브랜치 충돌 해결하기 (0) | 2022.12.06 |
| [깃허브 Github 공부하기] 4. 특정 지점으로 프로젝트 되돌리기, 커밋 메세지 변경하기 (0) | 2022.12.06 |
| [깃허브 Github 공부하기] 3. 파일 추가/수정하고 원격지 업데이트하기 (0) | 2022.12.06 |
| [깃허브 Github 공부하기] 2. 용어/동작원리 (0) | 2022.12.06 |


댓글